OBS Live Streaming
Stream in your language while viewers read translated subtitles on the video itself. Whisperr's Web App transcribes and translates your commentary in real time, and a transparent overlay page renders the subtitles inside OBS as a Browser Source — no plugins, no downloads, no GPU encoder changes. The overlay also shows a small QR code in the corner: viewers who want a different language can scan it and read along on their phone in any language Whisperr supports.
How It Works
- Start a broadcast in the Whisperr Web App with Share Link enabled — this creates a live room for your session
- Generate your overlay URL and add it to OBS as a Browser Source — translated subtitles appear over your stream as you speak
- Viewers scan the corner QR code to open the room on their phone and pick their own language
What You Need
- A Whisperr account, signed in to the Web App in Chrome
- OBS Studio (or any streaming software with a Browser Source, such as Streamlabs)
- Your usual stream setup — Twitch, YouTube Live, Kick, or anywhere else OBS can stream
Step 1 — Start a Broadcast with Share Link
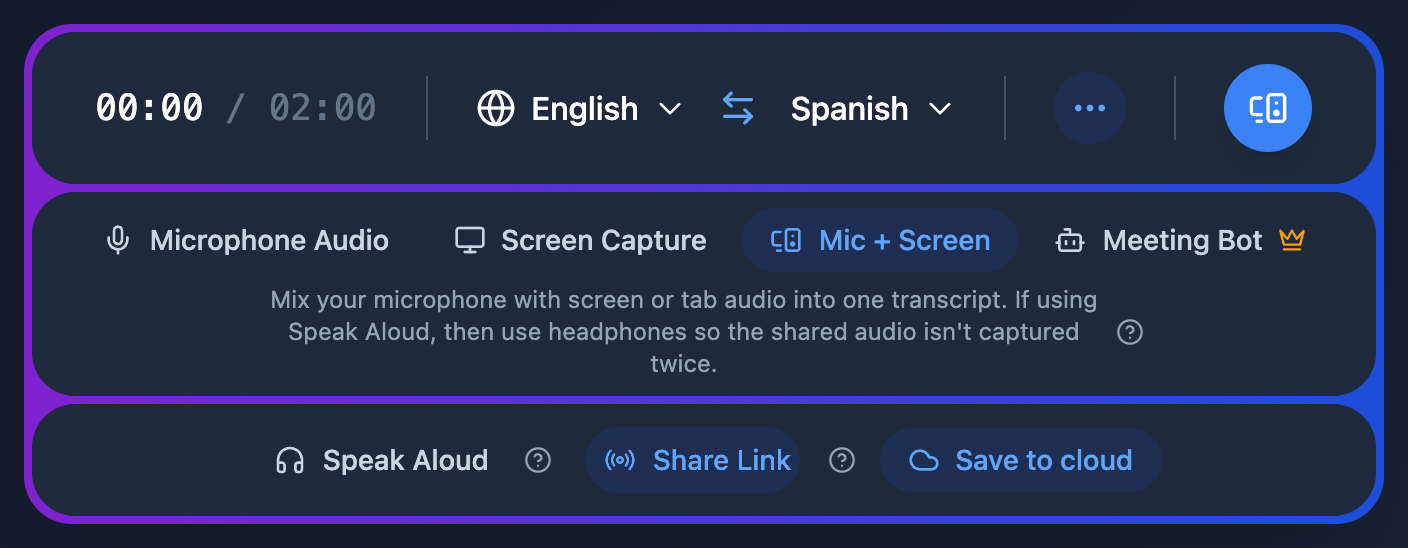
Open the Web App and start a new recording:
- Pick your spoken language and the translation language you want burned into the stream
- Choose an audio source — Microphone Audio for commentary, or Mic + Screen if you also want game or tab audio transcribed
- Turn on Share Link, then start recording
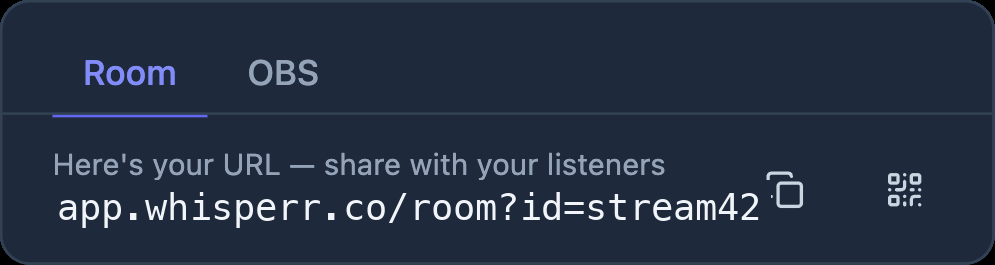
Once the recording starts, a share panel appears with two tabs: Room (the link and QR code your listeners can join directly) and OBS (the overlay setup link for your stream).
Step 2 — Open the Overlay Setup Page
In the share panel, click the OBS tab, then click the open icon next to the setup link — both highlighted in red below:
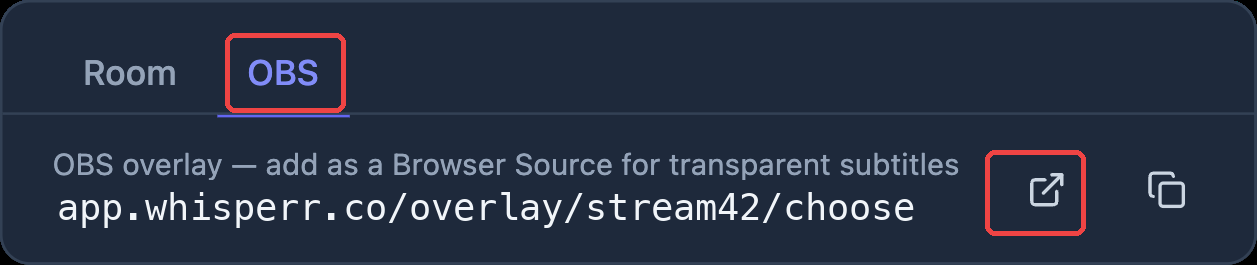
The overlay setup link looks like this:
https://whisperr.co/app/overlay/<your-room-id>/choose
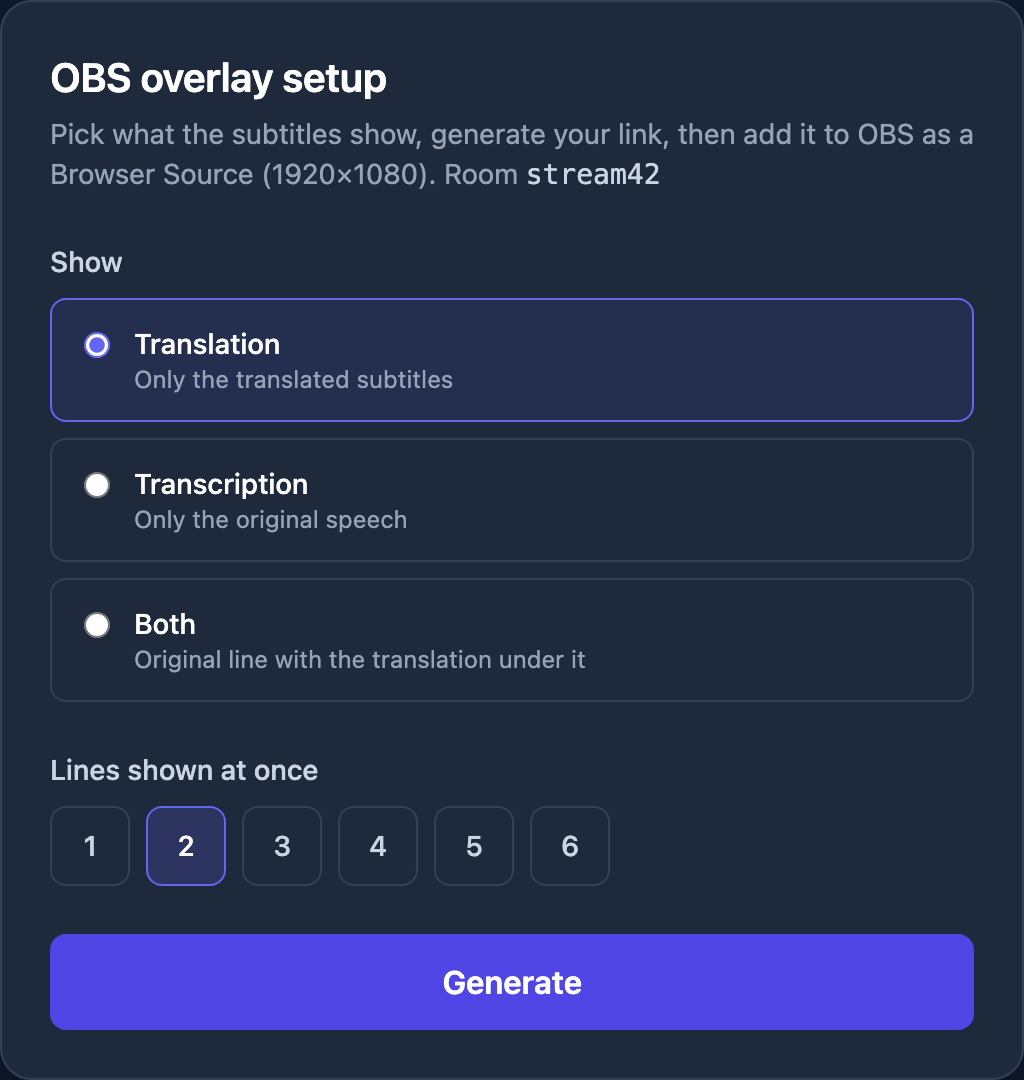
The setup page lets you pick what the on-stream subtitles show, without editing a URL by hand:
Step 3 — Choose What Viewers See and Generate the URL
- Translation — only the translated subtitles (the usual choice)
- Transcription — only your original speech, as live captions
- Both — your original line with the translation underneath, like bilingual subtitles
Pick how many caption lines stay on screen at once, press Generate, and copy the URL:
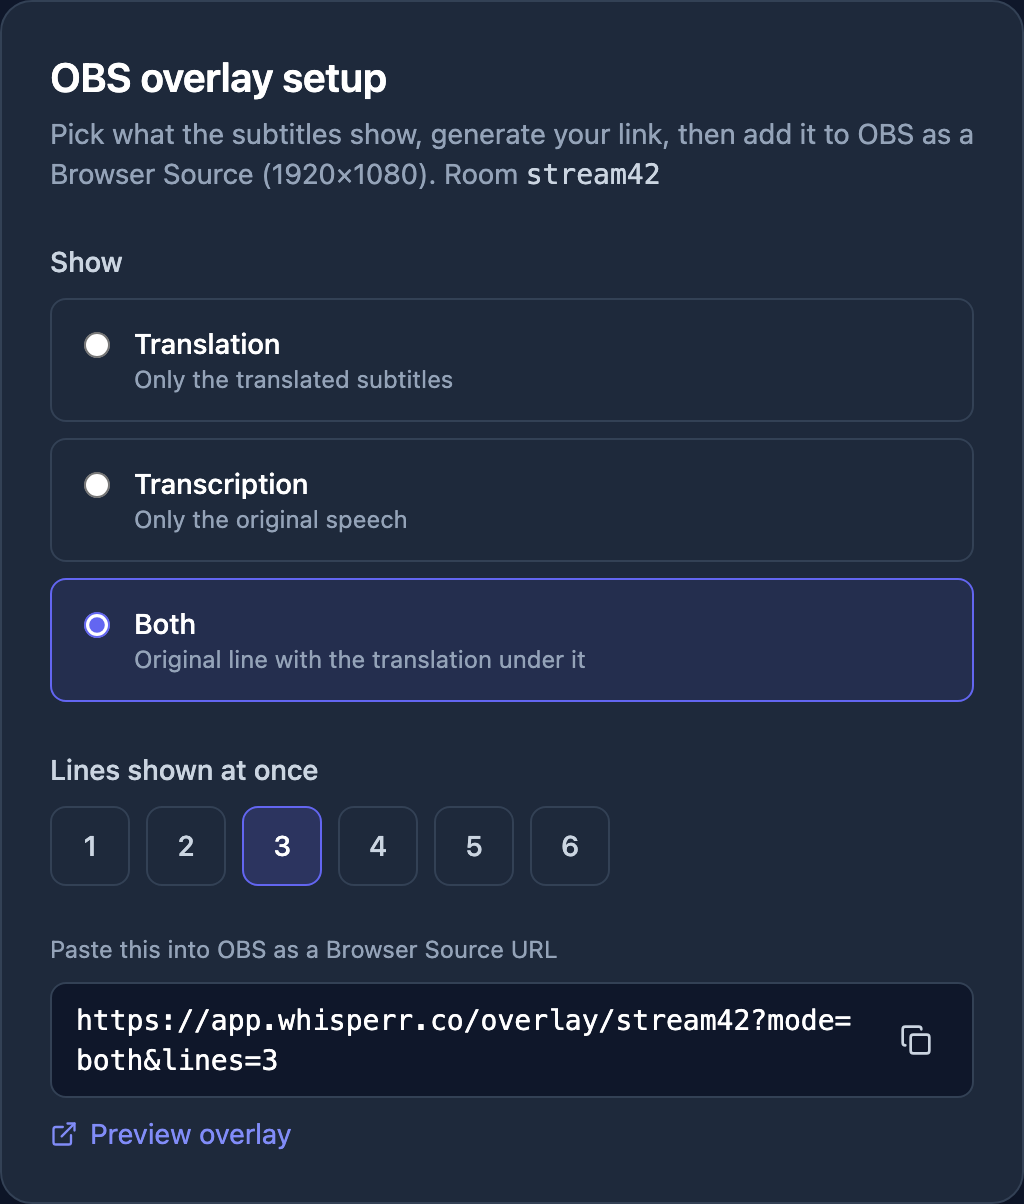
Paste the generated URL into OBS — not the setup page's own URL. The setup page is a configuration screen, and adding it to OBS would show the configuration card on your stream.
Step 4 — Add It to OBS as a Browser Source
In OBS:
- In Sources, click + and choose Browser
- Paste the generated URL into the URL field
- Set Width and Height to match your canvas — typically 1920 × 1080
- Click OK, then position the source above your gameplay or camera layers
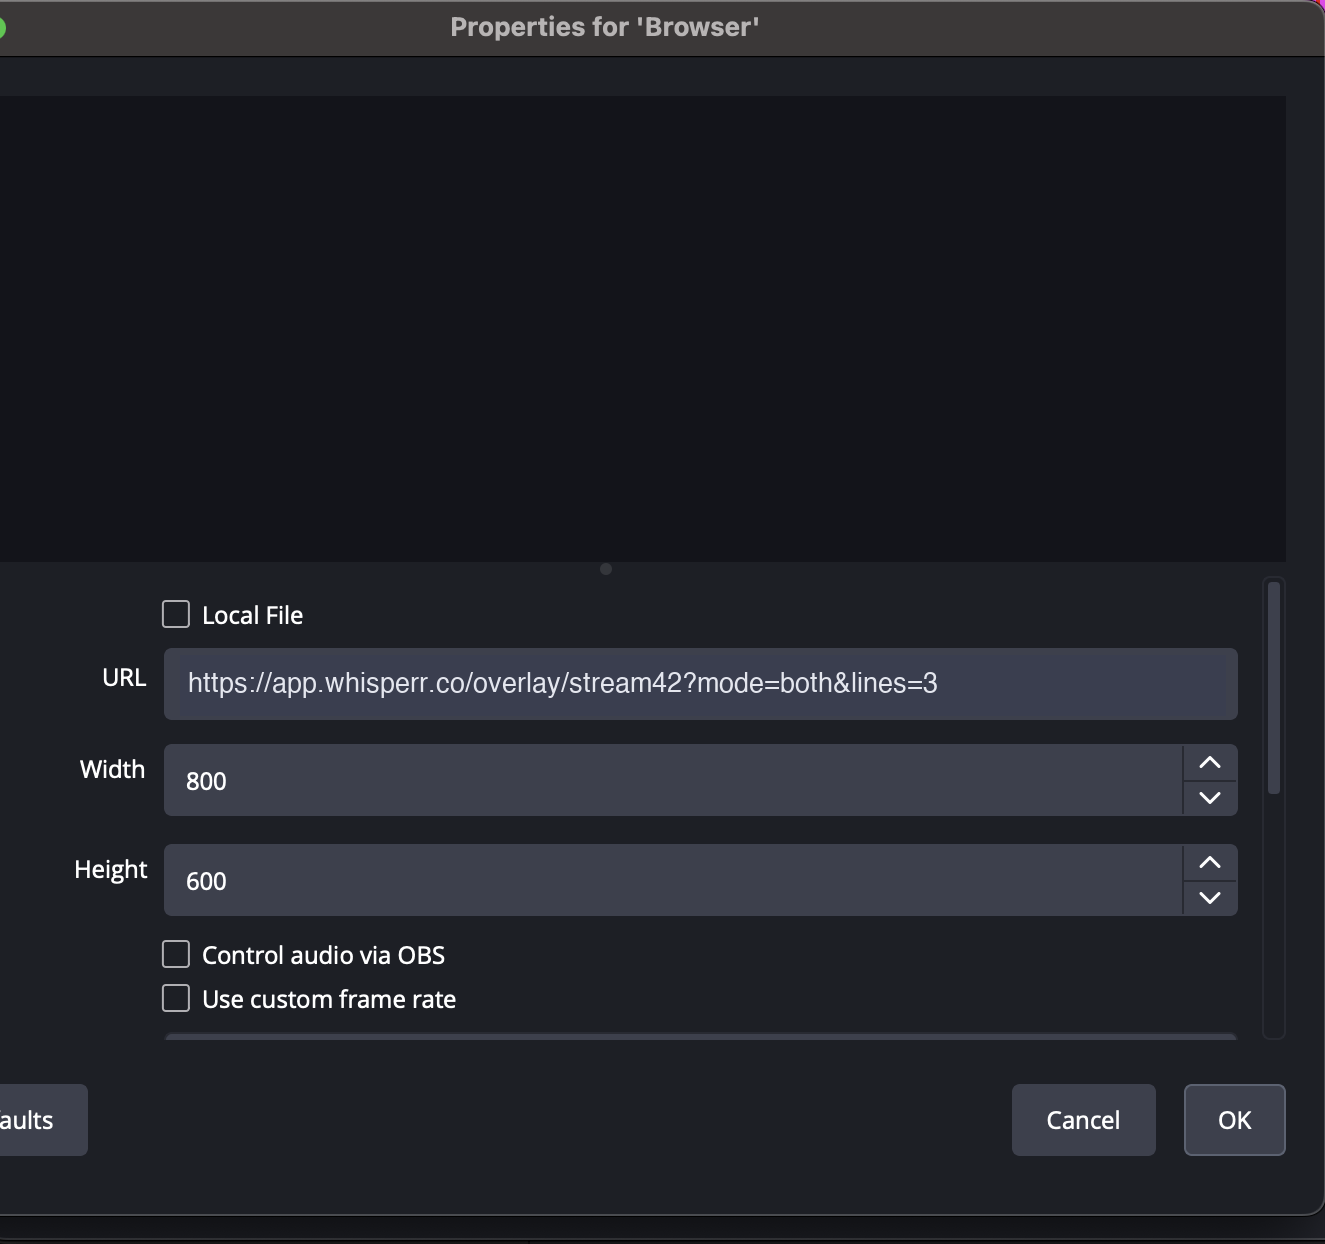
The overlay's background is fully transparent — when nobody is speaking, the source is invisible. For the first minute after it loads, it shows a dim status line ("Whisperr overlay connected — waiting for captions…") so you can confirm it's working while you set up; the status line disappears as soon as the first caption arrives, and never appears mid-stream.
Step 5 — Go Live
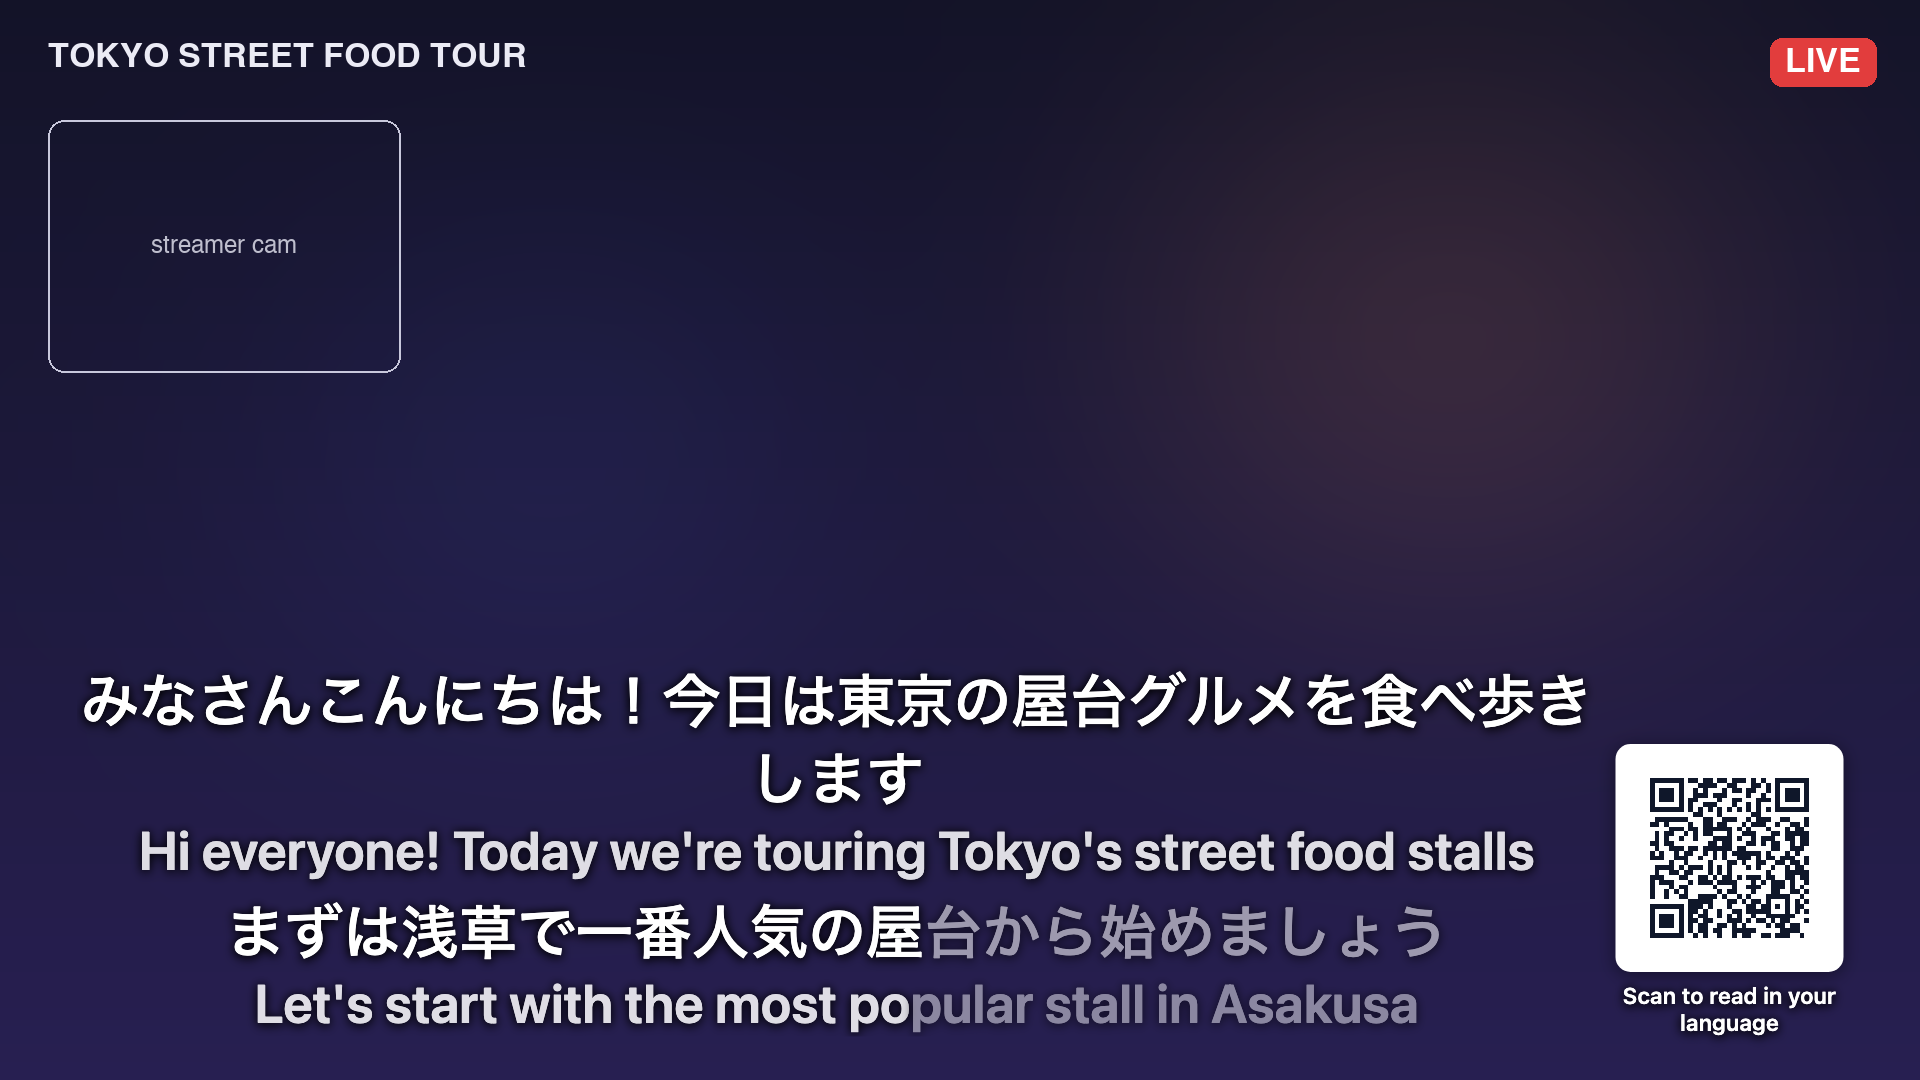
Speak normally. Subtitles appear over your stream in real time — the in-progress part of a sentence shows slightly dimmed and firms up as the transcription is confirmed, and finished lines fade out a few seconds after you stop speaking.
The Corner QR Code
Burned-in subtitles reach everyone, but they're one language. The QR code in the corner opens your live room on a viewer's phone, where they pick their own language and can even listen with text-to-speech. It's on by default with the caption "Scan to read in your language" — customize it with the URL parameters below (for example, ?qrlabel= with your own wording for your audience's language, or ?qr=0 to remove it).
Customize the Overlay
Every option is a URL parameter, since OBS browser sources can't be clicked. Add them to the generated URL with &:
| Parameter | Default | What it does |
|---|---|---|
mode | translation | translation, transcription, or both |
lines | 2 | Caption lines visible at once (1–6) |
size | 42 | Font size in px (12–120) |
color | ffffff | Text color — hex without #, or a CSS color name |
bg | 0 | Backdrop opacity behind each line, 0–1 (0 = text shadow only) |
hold | 8 | Seconds a finished line stays on screen (1–60) |
align | bottom | Anchor captions to the bottom or top |
lang | (all) | Only show translations for one target language, e.g. lang=es |
qr | on | qr=0 hides the corner QR code |
qrsize | 132 | QR code size in px (64–400) |
qrpos | br | QR corner: br, bl, tr, or tl |
qrlabel | Scan to read in your language | Caption under the QR code; qrlabel= (empty) shows the code alone |
For example, bigger yellow captions at the top with no QR code:
https://whisperr.co/app/overlay/<room-id>?size=56&color=ffcc00&align=top&qr=0
Tips and Troubleshooting
- The source shows nothing in OBS — right-click the Browser Source and choose Refresh cache of current page. If the status line says "connecting…" and never connects, check your network; if it says "waiting for captions", the overlay is healthy and your Whisperr session just isn't sending speech yet.
- Each stream is a new room — every recording session gets a fresh room ID, so generate a new overlay URL when you start a new broadcast, or keep the same Whisperr session running for the whole stream.
- Free plan sessions are limited to 2 minutes — for a real stream you'll want an upgraded plan so the session runs as long as you're live.
- Translating into several languages? Burn one language into the stream with
lang=, and let everyone else use the QR code — that's exactly what it's for.